
Car soundproofing has become a popular way to improve driving comfort. Reducing noise inside the cabin can lower the sound level by up to half. Vehicle owners choose acoustic insulation for many reasons. Some want better sound quality from the audio system. Others seek greater comfort during long trips.
The soundproofing process requires precision and knowledge of basic principles. Mistakes made during material installation can completely ruin the final effect. Improper selection of raw materials or neglecting key steps leads to disappointment. Money spent on materials is wasted without achieving the intended results. Knowing the most common mistakes helps avoid costly errors and achieve a satisfactory acoustic effect.
Effective vehicle soundproofing is a task that requires a systematic approach. Every stage is crucial to the final outcome. Surface preparation, material selection, and installation technique must be performed according to guidelines. Neglecting any element reduces the effectiveness of the entire project. A comprehensive approach to acoustic insulation guarantees measurable benefits.
Choosing inappropriate insulation materials for specific vehicle zones
The market offers various materials designed for car soundproofing. Each raw material has specific properties and purposes. Butyl mats effectively dampen mechanical vibrations of metal sheets. Rubber foams absorb sound waves traveling through the air. Polyurethane materials withstand high temperatures in the engine compartment. Choosing the wrong product leads to unsatisfactory results.
Each vehicle zone has its specific requirements. Temperature, exposure to moisture, and type of noise vary significantly. Using a universal approach for all components is a fundamental mistake. Effective soundproofing requires matching materials to specific working conditions. Informed purchasing decisions translate into achieving intended goals.
Using bituminous mats in high-temperature areas
Bituminous mats are among older insulation solutions. They contain asphalt and petroleum-based substances in their composition. Their main drawback is low resistance to high temperatures. The engine compartment and hood reach temperatures exceeding 212 degrees Fahrenheit (100 degrees Celsius). Bituminous materials begin to melt under such conditions. Melted asphalt emits an unpleasant odor into the passenger cabin.
The material’s structure deforms and loses insulating properties. On curved surfaces, bituminous mats often crack. They require heating during installation, which complicates the process. Additionally, they are heavy, adding weight to the vehicle. Professional workshops have been moving away from these products for years. Modern solutions offer much better parameters with less weight.
Main disadvantages of bituminous mats:
- Low thermal resistance limited to eighty degrees Celsius
- Unpleasant intense odor during vehicle operation
- Need to heat the material before application on the surface
- High weight burdening the body structure
- Cracking on curved body parts
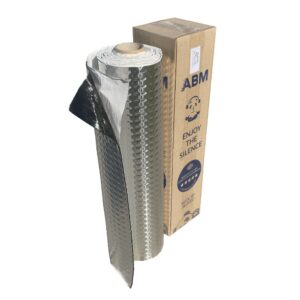
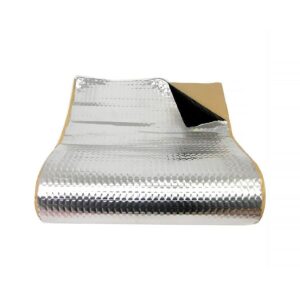
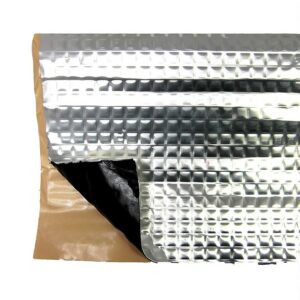
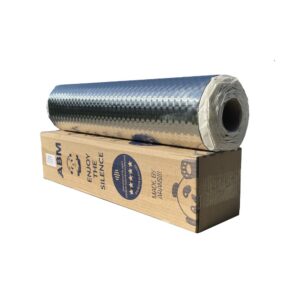
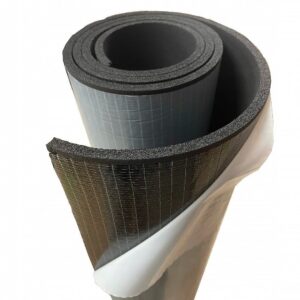
Butyl mats are a modern alternative to bituminous products. The operating temperature range is from minus forty to one hundred seventy degrees Celsius. ABM Insulation offers professional series butyl mats characterized by high flexibility. They contain no asphalt or other harmful substances. The self-adhesive layer facilitates installation without the need for heating. The material has low weight while maintaining excellent damping properties.

Using too thin layers of acoustic foam
The thickness of acoustic foam directly affects insulation effectiveness. Thin layers do not block low-frequency sound waves. Engine and tire noises require thicker absorbing materials. Foams thinner than eight millimeters have limited effectiveness. Saving on material thickness significantly reduces the final effect.
Different vehicle zones require different thicknesses of acoustic insulation. The cabin floor needs a layer at least ten millimeters thick. Wheel arches exposed to tire noise should have foam twenty millimeters thick. Doors can be protected with material eight to ten millimeters thick. The trunk acts as a resonance box requiring a thicker layer than other parts.
Recommended rubber foam thicknesses:
- Passenger cabin floor from ten to thirteen millimeters
- Front and rear wheel arches from nineteen to thirty-two millimeters
- Cabin doors from eight to ten millimeters
- Trunk and rear hatch from ten to sixteen millimeters
- Headliner from six to ten millimeters
- Engine hood from ten to thirteen millimeters
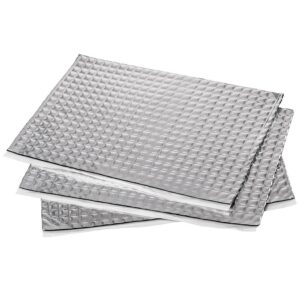
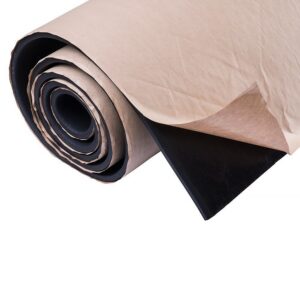
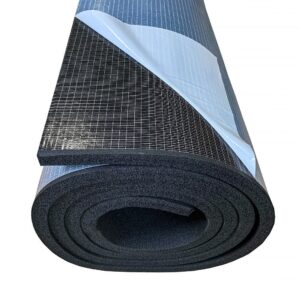
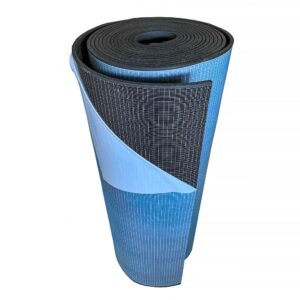
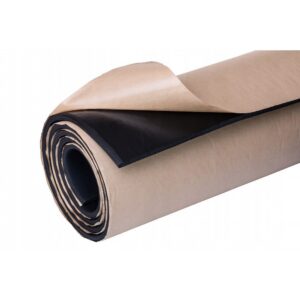
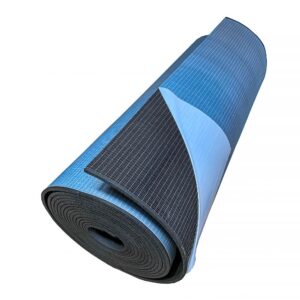
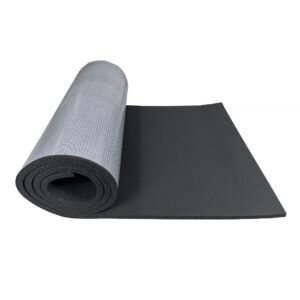
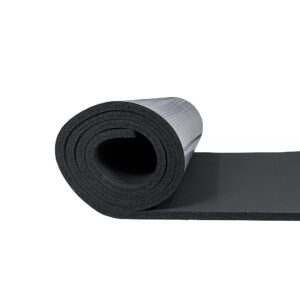
ABM Insulation rubber foam is available in thicknesses from three to thirty-two millimeters. Higher material density provides better sound absorption. Closed-cell structure effectively absorbs acoustic waves. The self-adhesive layer facilitates installation on previously installed butyl mat. The material does not absorb moisture and is resistant to chemicals and oils.
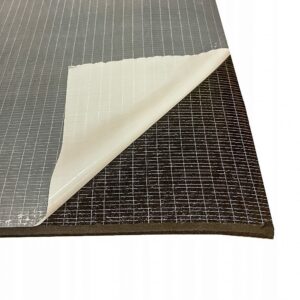
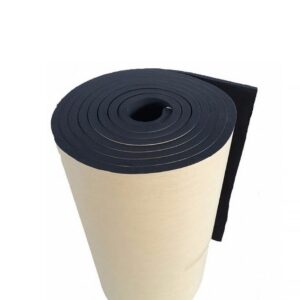
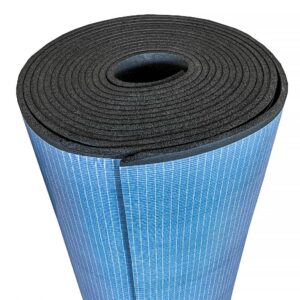
Rubber Foam. ABM Acoustic Insulation Self-adhesive, 25mm, 1m2
ABM Rubber Foam. Acoustic Insulation Self-adhesive, 32mm, 0.5m2
Rubber Foam. Acoustic Insulation Self-adhesive ABM, 32mm, 1m2
Ignoring moisture absorption properties of raw materials
Moisture poses a serious problem for insulating materials. Water-absorbing products promote rust development on metal sheets. Corrosion weakens the body structure and leads to damage. Felt mats absorb water and retain moisture for a long time. Bacteria and mold develop quickly in damp materials.
An unpleasant odor from damp materials penetrates the cabin. The drying process takes a long time and may be insufficient. Enclosed spaces in the bodywork promote moisture accumulation. In winter, water vapor condensation intensifies the moisture problem. Vapor-permeable materials significantly minimize the risk of corrosion. Professional products have a closed-cell structure that blocks water.
Butyl mats and rubber foams do not absorb water. They are resistant to moisture throughout their service life. The closed structure prevents water from penetrating the material. Mold resistance is guaranteed by antifungal agents in the composition. ABM Insulation materials meet all moisture resistance requirements. Certificates confirm no odor absorption and resistance to bacteria.
Before installing materials, the cleanliness of the bodywork drainage must be checked. Clogged drain holes lead to water accumulation in structural elements, accelerating corrosion.
Neglecting surface preparation before installation
Surface preparation is a key step preceding the application of soundproofing materials. The effectiveness of insulation largely depends on the quality of preparation. The body sheet metal must be perfectly clean and dry. Any contamination weakens the adhesive layer’s bonding strength. Neglecting this step leads to material detachment after a short period of use.
Manufacturers of butyl mats and rubber foams clearly specify installation requirements. The surface must be free of dust, grease, and rust. Substrate temperature affects the activation of the self-adhesive glue. Moisture completely prevents a durable bond between the material and metal sheet. Professional surface preparation ensures long-lasting insulation effectiveness for years of use. Saving time at this stage leads to serious problems in the future.
Installing materials on degreased body sheet metal
The body sheet metal accumulates grease from production processes. Factory preservatives leave a layer that hinders adhesion. Oils and greases from mechanical systems settle on components. Finger contact leaves greasy marks that reduce adhesion. The self-adhesive glue does not properly bond with greasy surfaces.
Degreasing requires using appropriate chemical agents. Isopropyl alcohol effectively removes grease from metal sheets. Specialized automotive degreasers offer even better results. The entire surface should be wiped with a clean cloth moistened with the agent. After drying, the metal is ready for insulation material application. Alcohol evaporates quickly without leaving any residue on the surface.
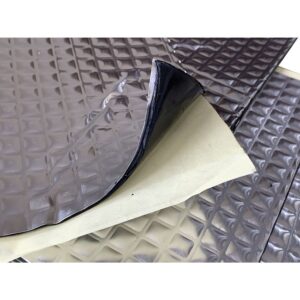
The ABM Professional butyl mat contains a strong adhesive layer with high adhesion strength. The adhesion force to steel exceeds three newtons per square centimeter. Proper degreasing guarantees full utilization of the glue’s potential. Neglecting this step leads to mat peeling. The surface must be degreased immediately before installing materials, not a day earlier. Freshly cleaned metal ensures the best adhesion of the self-adhesive layer.
Application of Layers on Wet or Contaminated Substrate
Water on the surface of the sheet metal prevents adhesion of insulation materials. The adhesive layer does not activate on a wet surface. Moisture trapped between the sheet metal and the mat leads to corrosion. Traces of rain or snow must be completely removed. Condensation formed in cold conditions requires drying before installation.
Dust and fine mechanical particles create a barrier between the adhesive and the metal. Even a thin layer of contamination reduces adhesion by half. Residues of old upholstery must be thoroughly removed. Plastic parts cannot remain under soundproofing mats. Any foreign fragment weakens the insulation system and creates an acoustic bridge. Professionals spend even several hours thoroughly cleaning the surface.
Surface Cleaning Procedure:
- Mechanical removal of loose contaminants with a brush and cloth
- Vacuuming the surface with a high-power industrial vacuum cleaner
- Cleaning hard-to-reach areas with compressed air
- Degreasing with isopropyl alcohol or a specialized preparation
- Drying the surface completely before installation
Cleaning should be performed using a high-power industrial vacuum cleaner. Compressed air effectively removes dust from hard-to-reach places. Cleaning with a damp cloth requires complete drying before installation. Ambient temperature affects drying time of the surface. Installation in dry conditions guarantees the best adhesion of materials for years.
Failure to Remove Rust and Old Preservative Residues
Rust significantly weakens the adhesion of materials to sheet metal. Corroded metal does not provide a stable substrate for the adhesive layer. Rust flakes fall off along with attached mats after some time. The corrosion process progresses unnoticed under the insulation material. Neglected areas rust increasingly, leading to damage to the vehicle structure.
Removing rust requires mechanical cleaning of the surface with a steel brush. A wire brush effectively removes loose corrosion flakes. Sandpaper smooths the surface preparing it for material application. A rust neutralizing agent protects against further corrosion of components. An anti-corrosion primer layer protects the sheet metal under insulation materials for years.
Factory preservatives contain waxes and protective agents that are difficult to remove. They must be completely removed before installing insulation materials. Chemical agents dissolve waxes without damaging the body sheet metal. Thorough cleaning of every element requires time and patience. Professional surface preparation prevents problems during years of vehicle use. Investing in proper preparations pays off many times by avoiding issues.
Tip: The substrate temperature should be at least fifteen degrees Celsius during installation. A cold surface requires warming to room temperature for optimal activation of the self-adhesive glue.
Incorrect technique of applying and pressing layers
The installation technique of soundproofing materials directly affects insulation effectiveness. Even the best products will not perform their function without proper application. Rolling, pressing, and eliminating air bubbles require precision. Professional tools significantly facilitate achieving optimal results. Neglecting installation technique completely negates the properties of the materials and wastes money.
Every centimeter of the material’s surface must adhere perfectly to the metal sheet. Air gaps between layers create acoustic bridges that allow sound to pass through. Sounds pass through these areas without any attenuation. Even pressing eliminates weak points in the insulation system. A methodical approach to each element guarantees project success and measurable results.
Skipping rolling of butyl mats after application
The butyl mat works effectively only when fully adhered to the metal surface. The adhesive layer requires pressure for proper activation and bonding. Hand smoothing does not provide sufficient pressure on the surface. A pressure roller evenly distributes force across the entire mat surface. A professional tool effectively eliminates air bubbles under the material.
Rolling should start from the center of the butyl mat sheet. The roller movement is directed toward the edges, pushing air outwards. Every section requires multiple passes with the pressing tool. Pressure must be even but not excessive throughout the process. Too much force can damage the material structure and aluminum layer. Properly rolled mat is completely smooth without any bulges.
The ABM Professional butyl mat thickness ranges from one and a half to four millimeters. Thicker mats require stronger pressure for full activation of the adhesive layer. A wooden or plastic roller protects the surface from damage during work. Material temperature affects ease of shaping and adhesion. Heated mats adhere more easily to curved surfaces of body parts. The roller can be replaced with a silicone roller used in construction with good results.
Creating air bubbles between material and substrate
Air bubbles under the butyl mat completely destroy its damping effectiveness. Vibrations pass through these areas without attenuation directly into the cabin. Every millimeter of gap significantly reduces insulation efficiency. Air trapped under the material creates a resonance space that amplifies noise. Sounds amplify in these empty areas instead of being dampened.
Eliminating bubbles requires systematic pressing from the center toward the edges of the mat. Starting rolling from the edge traps air inside the sheet. A patient and methodical approach prevents problems during installation. Visual surface inspection reveals areas needing additional pressure with a roller. Gently lifting an edge allows trapped air to escape without damaging the material.
Air bubble elimination technique:
- Start rolling from the center of the butyl mat sheet
- Roller movement from the center toward the edges pushing out air
- Visual inspection of the surface for bulges and bubbles
- Press problematic areas with a roller or fingers pointwise
- Roll again over the entire surface for assurance
Curved body surfaces require special attention during material installation. The mat must be gradually shaped from small pieces at bends. Cutting the material into smaller pieces facilitates fitting to the shape. Each element requires thorough rolling separately before moving to the next. Overlapping materials eliminate gaps that allow sound to pass through.
Applying insufficient pressure at element edges
The edges of mat sheets are often neglected during pressing by installers. Edges most frequently peel off, leading to insulation system failure. Every centimeter requires the same pressure as the center of the surface. Corners and curves require additional attention and precision during work. Point pressure with a finger may be necessary in difficult body areas.
Sharp metal edges can damage insulation material during vehicle use. Filing down sharp edges prevents cutting the butyl mat. The mat must cover the edge from all sides for full insulation. Aluminum tape protects edges from delamination over time. Professional edge finishing guarantees durability of modifications for years of use.
Moving parts like doors and trunk lids require particular care during installation. Vibrations during closing have a destructive effect on material edges. Improper protection leads to gradual detachment of insulation layers. All edges must be tightly trimmed and cut with a knife. Protruding fragments hinder upholstery installation and cause rattling while driving. Installation aesthetics matter even under vehicle upholstery.
Installation at too low ambient temperature
Ambient temperature is crucial for activating the adhesive layer of materials. Cold conditions significantly reduce butyl mat flexibility. Adhesive does not activate properly below ten degrees Celsius. The best installation temperature is around twenty degrees for optimal results. Product stored in cold requires acclimatization before use for several hours.
The mat should lie at room temperature for at least twelve hours. This process restores material flexibility and activates self-adhesive glue. Winter garage installation requires heating the room with a heater. Local heating with a heat gun facilitates shaping the mat on body curves. Temperature must not exceed fifty degrees Celsius during heating.
Low installation temperature leads to poor bonding of the material’s adhesive layer. Materials may initially stick but fall off after a short period of use. Vehicle vibrations and temperature fluctuations significantly accelerate mat delamination. Optimal installation conditions ensure a durable bond for years of use. Investing in heating the workspace pays off many times over by avoiding problems. Professional workshops operate in heated halls year-round.
Tip: Storing butyl mats in a cool warehouse requires acclimatization before installation. The material should reach room temperature before unpacking and applying it to the vehicle surface.
Selective soundproofing of components without a comprehensive plan
A comprehensive approach to vehicle soundproofing guarantees the best acoustic results. Noise reaches the cabin through multiple paths simultaneously via various components. Insulating only one component does not yield satisfactory final effects. Sounds quickly find other ways to penetrate the vehicle interior. Systematic soundproofing of all zones provides measurable benefits and driving comfort.
Project planning requires identifying the main noise sources in the vehicle. Different driving speeds reveal different acoustic problems to solve. At low speeds, engine and exhaust system noise dominate. Highway driving generates aerodynamic noise and tire sounds contacting the asphalt. Each source requires an appropriate approach to reduce sound levels. Professionals start by measuring noise levels under various driving conditions.
Limiting work exclusively to the passenger cabin floor
The floor is only one of the noise penetration paths into the interior. Focusing efforts solely on this component yields limited results. Sounds from the engine and exhaust system also pass through the bulkhead. Vibrations are transmitted directly through seat mounting points. Doors and headliner freely allow external noise into the vehicle.
Floor insulation effectively reduces mechanical vibrations transmitted through the bodywork. Butyl mat on the floor sheet metal dampens drumming very well. The rubber foam layer absorbs sounds propagating in the cabin air. Carpets and floor mats provide an additional acoustic barrier for feet. The effect is noticeable but insufficient without addressing other vehicle components.
Comprehensive soundproofing covers all vehicle zones generating noise into the cabin. Combining floor insulation with door insulation yields better acoustic results. The headliner effectively protects against rain noise and aerodynamic hum. The trunk requires similar treatment as the passenger cabin for full effect. A systematic approach ensures noise reduction by three to four decibels. Investing in all zones delivers the best return on money spent on materials.
Ignoring Wheel Wells as the Main Source of Tire Noise
Tires generate noise proportional to the vehicle’s speed on the road. Contact with the surface creates rolling sounds and vibrations transmitted through the suspension. Wheel wells transmit these sounds directly into the cabin without damping. The wheel well metal acts like a membrane significantly amplifying the sound. Sand and water hitting the fenders create very loud noises. Neglecting this area is one of the most serious installation errors.
Soundproofing wheel wells requires thicker layers of insulation materials than other components. The outer surface of the wheel well needs a four-millimeter thick butyl mat. The inner area requires rubber foam at least twenty millimeters thick. Double insulation ensures maximum effectiveness in reducing tire noise. The effect is noticeable during the first drive after installing the materials.
Steps for soundproofing wheel wells:
- Removing wheels and plastic wheel well liners with their fasteners
- Cleaning and degreasing the inner and outer metal of the wheel well
- Applying a four-millimeter butyl mat on the outer metal of the wheel well
- Installing twenty millimeters of rubber foam on the inner side
- Securing edges with aluminum tape to prevent material delamination
- Reinstalling plastic liners and vehicle wheels after completing work
Front wheel wells generally generate more noise than rear ones in most vehicles. Steering wheels additionally transmit vibrations from the steering system into the cabin. Rear wheel wells require equal attention despite producing less noise while driving. A comprehensive approach to all wheels yields the best final results. The cost of materials is low compared to the acoustic effect achieved. The price for twenty-millimeter rubber foam is approximately €20.75 per meter.
Neglecting Trunk and Headliner Insulation
The trunk acts as a resonating box amplifying every sound coming from behind. The empty space amplifies vibrations transmitted by the vehicle’s rear suspension. Rear wheels generate noise that passes directly into the trunk without barriers. The hatch is often not properly sealed, allowing outside noises to enter. Neglecting this area significantly worsens the overall soundproofing effect.
Covering all metal surfaces in the trunk with butyl mats effectively eliminates drumming sounds. A layer of rubber foam absorbs interior sounds within the cargo compartment. Rear wheel wells require particularly thick acoustic insulation like front ones. The rear hatch should be treated like passenger cabin doors. Comprehensive trunk soundproofing reduces noise by several decibels measurable with instruments.
The headliner protects against rain noise hitting the vehicle roof during precipitation. Raindrops create very loud sounds on an uninsulated roof sheet metal. Aerodynamic noise at high speeds penetrates through the roof into the cabin. A butyl mat on roof sheet metal dampens vibrations effectively reducing noise. Acoustic foam under ceiling upholstery absorbs sound reflections inside. Roof insulation is especially effective at reducing rain and hail noise. Removing ceiling upholstery is the most difficult operation requiring experience and patience.
Tip: Starting with the loudest areas delivers the fastest noticeable results while driving. Sound level measurements before and after each stage document the progress of the work performed.
Incorrect order of applying different types of materials
The layered system of insulating materials requires maintaining a specific installation sequence. Each raw material serves a particular function within the overall insulation system. The butyl mat effectively dampens mechanical vibrations of the car sheet metal. Rubber foam absorbs sound waves propagating through the cabin air. Reversing this sequence significantly reduces insulation effectiveness, greatly diminishing the materials’ potential.
The layer directly on the metal must dampen vibrations of the vehicle body structure. A high-density material converts vibration energy into heat dissipated. The next layer absorbs sounds passing through the first acoustic barrier. The closed-cell structure of the foam effectively traps acoustic waves inside. Each layer enhances the effect of the previous one, creating a comprehensive insulation system. A professional approach requires knowledge of sound physics and properties of applied materials.
Applying rubber foam directly on metal
Rubber foam does not effectively dampen mechanical vibrations of car body sheet metal. Its structure is too soft to convert mechanical vibrations. Direct application on metal does not effectively reduce rattling in the cabin. Vibrations pass through the foam without significant amplitude damping. The foam’s function is solely to absorb airborne sound waves.
The car body sheet metal requires a hard material that immediately dampens mechanical vibrations. A high-density butyl mat perfectly fulfills this role as the first layer. The aluminum layer in the mat increases structural stiffness of the component. Butyl converts vibration energy into heat dissipated on the mat’s surface. Only after installing the butyl mat can rubber foam be applied effectively.
Reversing this order completely wastes both materials’ properties. Foam on metal does not absorb sounds effectively without prior vibration damping. Butyl mat placed over foam cannot access the sheet metal. The system loses most of its efficiency due to incorrect layering order. Proper layer sequencing guarantees optimal vehicle acoustic insulation performance. Material manufacturers clearly specify correct product application in their instructions.
Omitting vibration damping layer under sound insulation
Mechanical vibrations directly generate secondary sounds in vehicle body components. Untreated sheet metal acts like a speaker membrane, significantly amplifying noise. Acoustic insulation alone does not handle this problem effectively. Sound waves originate directly within the body structural material. Damping vibrations at their source is crucial for overall system efficiency.
The butyl mat as the first layer reduces vibration amplitude of car body sheet metal. It increases effective mass of the sheet, inhibiting its mechanical oscillations. The aluminum layer stiffens construction, preventing component resonance. Butyl absorbs vibrational energy, converting it into dissipated heat. Only after this stage can foam effectively absorb airborne sounds.
Functions of individual insulation layers:
- The butyl mat dampens mechanical vibrations of the sheet metal by converting them into heat
- Rubber foam absorbs sound waves propagating in the cabin air
- The aluminum layer increases stiffness and reflects engine thermal radiation
- The factory upholstery serves as the final acoustic barrier and aesthetic finish
Omitting the butyl mat is the most common and serious mistake during soundproofing. Foam alone will not achieve a satisfactory acoustic effect without the first layer. The investment in materials is wasted without a proper damping base. Professional soundproofing always starts with vibration damping using butyl mats. The layered system only works if all layers are applied in the correct order. Saving on the butyl mat is a false economy leading to disappointment with the results.
Reversing the layered system of butyl and acoustic absorber
The layered system of butyl mats and rubber foams has a proven fixed structure. The first layer on metal must be a hard material that dampens vibrations. The ABM Professional butyl mat contains an aluminum layer 0.01 millimeters thick. The material density exceeds at least fifteen hundred kilograms per cubic meter. These parameters ensure effective damping of mechanical vibrations of the body sheet metal.
The second layer is closed-cell rubber foam that insulates against moisture. The density is about thirty-three kilograms per cubic meter of material. The material effectively absorbs sound waves penetrating through the first acoustic barrier. Foam thickness ranges from three to thirty-two millimeters depending on the vehicle zone. The self-adhesive layer facilitates installation directly on the butyl mat without additional glue.
Reversing the order of these materials completely negates their insulating properties. Soft foam on metal does not dampen vibrations effectively in any way. Hard mat on foam has no access to the source of mechanical vibrations. The system loses most of its effectiveness due to incorrect layer structure. Maintaining the correct order is absolutely crucial for successful soundproofing project execution. The price of the butyl mat ranges from 6.25 to 12.50 EUR per square meter.
Tip: ABM Insulation rubber foam has a self-adhesive layer dedicated for installation on a previously installed butyl mat. Application directly on metal requires additional glue and is acoustically less effective.
FAQ: Frequently Asked Questions
Can improperly done car soundproofing be repaired without dismantling all materials?
Repairing faulty soundproofing depends on the type of error made during installation. Problems with unrolled butyl mats require partial upholstery removal for re-pressing. Peeling fragments can be repaired spot-wise without dismantling the entire insulation system. Acoustic bridges caused by leaks require applying aluminum tape between layers.
The complete replacement of materials becomes necessary when the layer order is incorrect. Foam applied directly to metal must be removed for the application of the butyl mat. Professional workshops offer acoustic diagnostics that identify specific issues during installation. A thorough condition assessment allows determining the scope of necessary repairs without wasting well-installed components.
How long does professional comprehensive soundproofing of the entire vehicle take?
The time required for comprehensive soundproofing ranges from two to four working days. Removing upholstery and all plastic parts takes the first day of the mechanic’s work. Surface preparation through cleaning and degreasing requires several hours of careful work. The application and pressing of materials is the longest stage, requiring precision and patience.
Basic time stages of the work:
- Disassembly of the complete interior equipment of the vehicle from six to eight hours
- Surface preparation by cleaning and degreasing from three to four hours
- Installation of butyl mats with rolling out from eight to ten hours
- Application of rubber foams on all zones from four to six hours
- Reassembly of upholstery and checking fitment of parts from six to eight hours
Reassembly of upholstery and quality control take another full day. Specialized workshops work methodically on one vehicle from start to finish. A single mechanic is responsible for all stages, ensuring consistency in workmanship. Waiting times at reputable workshops range from four to eight weeks due to high demand.
Does soundproofing a car under factory warranty automatically void protection?
Soundproofing a vehicle does not automatically void the manufacturer’s factory warranty. EU regulations protect the owner’s right to modify the vehicle outside authorized networks. The manufacturer must prove a direct link between the modification and any resulting mechanical fault. Professionally performed soundproofing does not interfere with the vehicle’s mechanical or electronic systems.
A problem may arise if parts are damaged during unprofessional self-removal of upholstery. Broken clips, scratched plastic upholstery, or damaged wiring lose warranty coverage. Onboard computer errors caused by accidental sensor disconnection are not covered by repair. Authorized service centers may refuse warranty claims on parts directly related to acoustic modification.
Photographic documentation before and after work protects against unjustified dealer claims. Invoices for materials and services confirm professional execution of insulation modification. Reputable workshops offer their own warranty on completed work for several years of use. The workshop’s liability insurance covers any potential damages incurred during material installation.
What are the average costs of materials needed for self-soundproofing a standard passenger car?
The cost of materials for self-soundproofing a standard passenger car ranges from three hundred to five hundred euros. A two-millimeter thick butyl mat costs about 6.25 euros per square meter. A ten-millimeter thick rubber foam is priced at around 12.50 euros per square meter. A compact class car requires about ten square meters of mat and eight meters of foam in total.
Estimated material costs:
- Butyl mat ten square meters from 62.50 to 125 euros
- Rubber foam eight square meters from 100 to 150 euros
- Aluminum tape for layer bonding about 12.50 euros per roll
- Degreaser or isopropyl alcohol about 7.50 euros per liter
- Professional pressure roller about 20 euros each
Thicker premium materials increase costs by half with better insulation parameters. Tools like an upholstery removal kit cost about 25 euros one-time. The time for self-installation ranges from two to four weekend days. Professional installation services cost from 500 to 1,000 euros depending on the workshop.
How to objectively check the effectiveness of the soundproofing performed using measurements?
Measuring noise levels requires an acoustic meter available for about 50 euros. Measurements should be taken before and after soundproofing under identical driving conditions to obtain a comparison. Vehicle speed, ambient temperature, and road surface must be the same during both tests. The meter’s microphone is placed in the same cabin location for reliable comparative results.
Effective soundproofing reduces noise levels by three to five decibels during city driving. Highway driving shows a decrease of four to six decibels at speeds of one hundred twenty kilometers per hour. A three-decibel difference means a subjective halving of volume for the human ear. Professional workshops document measurements before and after work as proof of service effectiveness.
Mobile apps for noise measurement can serve as an inexpensive approximate measurement tool. Smartphone accuracy is lower than professional meters but shows trends in changes. Recording sound before and after allows subjective comparison of interior acoustic quality. Test driving with a passenger evaluating noise levels provides additional practical information. The ability to hold a conversation without raising one’s voice is a good indicator of improved insulation.
Summary
Effective car soundproofing requires knowledge of common mistakes and ways to avoid them. Proper selection of materials for specific vehicle zones forms the foundation of the project. Bituminous mats do not perform well at all in high engine compartment temperatures. Too thin layers of acoustic foam do not effectively block low-frequency noise. Moisture-absorbing materials lead to corrosion and harmful mold growth. Installation temperature significantly affects the durability of material-to-metal bonds.
Surface preparation before installation is crucial for the durability of layer bonding. Degreasing the sheet metal with isopropyl alcohol ensures maximum adhesion of the self-adhesive glue. Installing on a damp or contaminated substrate leads to material detachment over time. Removing rust and old preservatives protects against further corrosion of body parts. Rolling out butyl mats with a pressure roller eliminates air bubbles beneath the surface. Every centimeter of the surface must adhere evenly to the sheet metal for optimal effectiveness.
A comprehensive approach to all vehicle zones yields the best measurable acoustic results. Neglecting any element significantly reduces the effectiveness of the entire insulation system. Maintaining the correct sequence of butyl and rubber layers guarantees optimal damping performance. Professional materials from ABM Insulation meet the highest standards of quality and user safety. Investing in proper products and careful installation brings years of driving comfort.
Sources:
- https://www.sciencedirect.com/science/article/pii/S235214652300090X
- https://journals.sagepub.com/doi/full/10.1177/16878132251345867
- https://knaufautomotive.com/why-does-acoustics-in-cars-matter/
- https://jcarme.sru.ac.ir/article_2365_c60d53f108aea45f1f3a971e4b74b0e6.pdf
- https://www.cetjournal.it/index.php/cet/article/view/CET24114128
- https://patents.google.com/patent/WO2014162244A1/en
- https://www.inria.fr/en/new-concept-acoustic-insulation-transport
- https://wjarr.com/sites/default/files/WJARR-2020-0012.pdf
- https://www.nature.com/articles/s41598-024-55823-x
